 AI
AI
 ChatGPT
 Gemini
 Thư viện Prompt
 Công nghệ
 Học IT
 Tiện ích
Hiệu ứng chuyển động Animation trong CSS

Animation trong CSS cực kỳ cần thiết trong thiết kế web. Bài viết sẽ hướng dẫn bạn code hiệu ứng cho web từ animation CSS.
CSS là viết tắt của Cascading Style Sheet, được sử dụng để thiết kế một trang web. HTML tạo nên cấu trúc trang web, nhưng CSS là thứ được sử dụng để tạo nên thiết kế đó. Ở bài viết này, bạn sẽ học được những kiến thức cơ bản để ứng dụng Animation của CSS vào thực tế.
Mục lục bài viết
- CSS Animation là gì?
- Quy tắc Keyframe
- Thuộc tính animation-delay
- Thuộc tính animation-iteration-count
- Thuộc tính animation-direction
- Thuộc tính animation-timing-function
- Thuộc tính animation-fill-mode
- Gộp chung các thuộc tính
- Mẹo dùng animation CSS lập trình viên cần biết
- Ví dụ về hiệu ứng CSS sáng tạo
CSS Animation là gì?
Hoạt ảnh CSS hay Animation là một cách tạo hiệu ứng hoạt ảnh trực quan bằng ngôn ngữ Cascading Style Sheets (CSS). Chúng cho phép bạn tạo hình ảnh động các thuộc tính của một phần tử, chẳng hạn như kích thước, màu sắc hoặc vị trí của nó, trong một khoảng thời gian xác định.
Cấu hình một Animation
Để cấu hình hoạt ảnh, hãy làm theo các bước sau:
- Đầu tiên, hãy mở phần mềm hoạt ảnh bạn đang sử dụng.
- Tiếp theo, hãy tạo một dự án mới hoặc mở một dự án hiện có.
- Chọn đối tượng hoặc nhân vật mà bạn muốn tạo hoạt ảnh.
- Đặt mốc thời gian cho hoạt ảnh bằng cách xác định độ dài và số khung hình.
- Chọn loại hoạt ảnh bạn muốn tạo, chẳng hạn như khung hình chính hoặc đồ họa chuyển động.
Để tạo một chuyển động Animation, bạn cần phải có các keyframe. Mỗi keyframe sẽ được chạy ở một thời điểm xác định và trong keyframe đó nó quy định việc phần tử sẽ di chuyển ra sao.
Ngoài ra, Animation còn gồm một số thuộc tính quy định các chi tiết khá quan trọng của hiệu ứng thường đi kèm như:
- Thuộc tính animation-name
- Thuộc tính animation-duration
- Thuộc tính animation-timing-function
- Thuộc tính animation-delay
- Thuộc tính animation-iteration-count
- Thuộc tính aniamtion-direction
- Thuộc tính animation-fill-mode
Cùng Quantrimang.com tìm hiểu kỹ hơn về keyframe và các thuộc tính cần thiết trong nội dung tiếp theo.
Quy tắc Keyframe
Bên trong quy tắc này, bạn xác định các keyframe để quy định việc phần tử sẽ chuyển động ra sao tại mỗi thời điểm nhất định.
Cú pháp của keyframe:
@keyframes Name {/*code*/}
- Name: tên của animation bạn muốn tạo.
- code: Các đoạn code quy định tiến trình chuyển động. Có 2 dạng:
- Sử dụng phần trăm từ 0% đến 100%.
- from...to: thiết lập giá trị từ khởi đầu (from - tương đương với 0%) đến kết thúc (to - tương đương với 100%).
Để chuyển động xảy ra cần phải kết nối @keyframes với phần tử.
Bảng tóm tắt các hiệu ứng animation trong CSS cần biết:
|
Thuộc tính |
Mô tả |
|
Chỉ định code animation |
|
|
Một thuộc tính tốc ký để thiết lập tất cả các thuộc tính hoạt hình |
|
|
Chỉ định trì hoãn bắt đầu animation |
|
|
Chỉ định xem hoạt ảnh sẽ được phát tiến, lùi hay theo chu kỳ thay thế |
|
|
Chỉ định thời gian một hoạt ảnh sẽ hoàn thành một chu kỳ |
|
|
Chỉ định kiểu cho thành phần khi hoạt ảnh không phát (trước khi bắt đầu, sau khi kết thúc hoặc cả hai) |
|
|
Chỉ định số lần hoạt ảnh sẽ được phát |
|
|
Chỉ định tên của hoạt ảnh @keyframe |
|
|
Chỉ định hoạt ảnh đang chạy hoặc tạm dừng |
|
|
Chỉ định đường cong tốc độ của hoạt ảnh |
Ví dụ 1: Thay đổi màu nền background, sử dụng cú pháp from...to:
/* Code animation */@keyframes example {from {background-color: pink;}to {background-color: purple;}}/* Áp dụng animation vào phần tử */div {width: 100px;height: 100px;background-color: purple;animation-name: example;animation-duration: 4s;}
Ví dụ 2: Thay đổi màu nền background, sử dụng cú pháp %:
/* Code animation */@keyframes example {0% {background-color: crimson;}25% {background-color: lightsalmon;}50% {background-color: pink;}100% {background-color: indigo;}}/* Áp dụng animation vào phần tử */div {width: 100px;height: 100px;background-color: crimson;animation-name: example;animation-duration: 4s;}

Code đầy đủ:
<!DOCTYPE html><html><head><style>div {width: 100px;height: 100px;background-color: Crimson;-webkit-animation-name: example; /* Safari 4.0 - 8.0 */-webkit-animation-duration: 4s; /* Safari 4.0 - 8.0 */animation-name: example;animation-duration: 4s;}/* Safari 4.0 - 8.0 */@-webkit-keyframes example {0% {background-color: Crimson;}25% {background-color: LightSalmon;}50% {background-color: pink;}100% {background-color: purple;}}/* Cú pháp tiêu chuẩn */@keyframes example {0% {background-color: Crimson;}25% {background-color: LightSalmon;}50% {background-color: pink;}100% {background-color: indigo;}}</style></head><body><div></div></body></html>
Ví dụ 3: Thay đổi cả màu nền và vị trí của phần tử <div> khi animation đạt 25%, 50% và 100%:
/* Code animation */@keyframes example {0% {background-color:red; left:0px; top:0px;}25% {background-color:yellow; left:200px; top:0px;}50% {background-color:blue; left:200px; top:200px;}75% {background-color:green; left:0px; top:200px;}100% {background-color:red; left:0px; top:0px;}}/* Áp dụng animation vào phần tử */div {width: 100px;height: 100px;position: relative;background-color: red;animation-name: example;animation-duration: 4s;}

Code đầy đủ:
<!DOCTYPE html><html><head><style>div {width: 100px;height: 100px;background-color: crimson;position: relative;-webkit-animation-name: example; /* Safari 4.0 - 8.0 */-webkit-animation-duration: 4s; /* Safari 4.0 - 8.0 */animation-name: example;animation-duration: 4s;}/* Safari 4.0 - 8.0 */@-webkit-keyframes example {0% {background-color:crimson; left:0px; top:0px;}25% {background-color:lightsalmon; left:200px; top:0px;}50% {background-color:seagreen; left:200px; top:200px;}75% {background-color:midnightblue; left:0px; top:200px;}100% {background-color:indigo; left:0px; top:0px;}}/* Cú pháp tiêu chuẩn */@keyframes example {0% {background-color:crimson; left:0px; top:0px;}25% {background-color:lightsalmon; left:200px; top:0px;}50% {background-color:seagreen; left:200px; top:200px;}75% {background-color:midnightblue; left:0px; top:200px;}100% {background-color:indigo; left:0px; top:0px;}}</style></head><div></div></body></html>
Lưu ý: Để tạo ra hiệu ứng Animation, bạn phải xác định ít nhất hai điều:
- Thuộc tính animation-duration là khoảng thời gian diễn ra hiệu ứng. Nếu phần duration không được chỉ định sẽ không xảy ra hiệu ứng vì giá trị mặc định bằng 0.
- Thuộc tính animation-name xác định phần tử sẽ thực thi animation nào.
Thuộc tính animation-delay
Thuộc tính animation-delay sử dụng để xác định khoảng thời gian trì hoãn giữa thời gian một thuộc tính thay đổi và lúc hiệu ứng animation thực sự bắt đầu.
Ví dụ 1: Độ trễ 1 giây trước khi bắt đầu hiệu ứng.
div {width: 100px;height: 100px;position: relative;background-color: red;animation-name: example;animation-duration: 4s;animation-delay: 1s;}

Code đầy đủ:
<!DOCTYPE html><html><head><style>div {width: 100px;height: 100px;background-color: crimson;position: relative;-webkit-animation-name: example; /* Safari 4.0 - 8.0 */-webkit-animation-duration: 4s; /* Safari 4.0 - 8.0 */-webkit-animation-delay: 2s; /* Safari 4.0 - 8.0 */animation-name: example;animation-duration: 4s;animation-delay: 1s;}/* Safari 4.0 - 8.0 */@-webkit-keyframes example {0% {background-color:crimson; left:0px; top:0px;}25% {background-color:lightsalmon; left:200px; top:0px;}50% {background-color:seagreen; left:200px; top:200px;}75% {background-color:midnightblue; left:0px; top:200px;}100% {background-color:indigo; left:0px; top:0px;}}/* Standard syntax */@keyframes example {0% {background-color:crimson; left:0px; top:0px;}25% {background-color:lightsalmon; left:200px; top:0px;}50% {background-color:seagreen; left:200px; top:200px;}75% {background-color:midnightblue; left:0px; top:200px;}100% {background-color:indigo; left:0px; top:0px;}}</style></head><body><div></div></body></html>
Animation-delay chấp nhận cả giá trị âm. Nếu sử dụng các giá trị âm, animation sẽ bắt đầu như kiểu phần tử đã phát trong N giây.
Ví dụ 2: Animation sẽ bắt đầu như thể nó đã phát được 2 giây:
div {width: 100px;height: 100px;position: relative;background-color: red;animation-name: example;animation-duration: 4s;animation-delay: -2s;}

Thuộc tính animation-iteration-count
Thuộc tính animation-iteration-count sử dụng để thiết lập số lần thực hiện một animation. Giá trị thường là:
- Một số lần nhất định
- infinite: animation lặp lại liên tục và vô hạn
Ví dụ 1: Animation chạy 3 lần và dừng lại
|
 |
Ví dụ 2: Animation lặp lại liên tục và vô hạn
|
 |
Thuộc tính animation-direction
Thuộc tính animation-direction sử dụng để xác định chiều chạy của animation. Các giá trị mà animation-direction có thể nhận là:
- normal: animation di chuyển bình thường tiến về phía trước (mặc định)
- reverse: animation di chuyển theo hướng ngược lại, lui về sau.
- alternate: animation di chuyển tiến về trước, sau đó lui theo hướng ngược lại
- alternate-reverse: animation di chuyển ngược lại trước, rồi đổi chiều tiến về trước.
Ví dụ 1: Chạy animation theo hướng ngược lại
|
 |
Ví dụ 2: Chạy animation với giá trị alternate
|
 |
Ví dụ 3: Chạy animation với giá trị alternate-reverse
|
 |
Code đầy đủ để bạn tham khảo:
<!DOCTYPE html><html><head><style>div {width: 100px;height: 100px;background-color: crimson;position: relative;-webkit-animation-name: example; /* Safari 4.0 - 8.0 */-webkit-animation-duration: 4s; /* Safari 4.0 - 8.0 */-webkit-animation-direction: reverse; /* Safari 4.0 - 8.0 */animation-name: example;animation-duration: 4s;animation-direction: alternate-reverse;animation-iteration-count: 2;}/* Safari 4.0 - 8.0 */@-webkit-keyframes example {0% {background-color:crimson; left:0px; top:0px;}25% {background-color:lightsalmon; left:200px; top:0px;}50% {background-color:seagreen; left:200px; top:200px;}75% {background-color:midnightblue; left:0px; top:200px;}100% {background-color:indigo; left:0px; top:0px;}}/* Standard syntax */@keyframes example {0% {background-color:crimson; left:0px; top:0px;}25% {background-color:lightsalmon; left:200px; top:0px;}50% {background-color:seagreen; left:200px; top:200px;}75% {background-color:midnightblue; left:0px; top:200px;}100% {background-color:indigo; left:0px; top:0px;}}</style></head><body><div></div></body></html>
Thuộc tính animation-timing-function
Thuộc tính animation-timing-function dùng để xác định tốc độ thay đổi khi hiệu ứng di chuyển.
Các giá trị có sẵn như sau:
- ease: tạo hiệu ứng chuyển đổi khi bắt đầu thì chậm sau đó nhanh dần và gần kết thúc lại chậm dần (giá trị mặc định).
- linear: tạo hiệu ứng chuyển đổi từ lúc bắt đầu với lúc kết thúc tốc độ là như nhau.
- ease-in: tạo hiệu ứng chuyển đổi chậm lúc bắt đầu.
- ease-out: tạo hiệu ứng chuyển đổi chậm lúc kết thúc.
- ease-in-out: tạo hiệu ứng chuyển đổi chậm cả lúc bắt đầu và kết thúc.
- cubic-bezier(n,n,n,n): cho phép bạn xác định một giá trị của riêng mình theo hàm bezier (Quantrimang.com sẽ giới thiệu ở một bài riêng sau nhé).
#div1 {animation-timing-function: linear;}#div2 {animation-timing-function: ease;}#div3 {animation-timing-function: ease-in;}#div4 {animation-timing-function: ease-out;}#div5 {animation-timing-function: ease-in-out;}
Bạn tự chạy theo code sau để thấy rõ sự khác nhau nhé:
<!DOCTYPE html><html><head><style>body{background-color:#e9d8f4}div {width: 100px;height: 50px;background-color: #58257b;color:white;font-family:arial;position: relative;-webkit-animation: mymove 5s infinite; /* Safari 4.0 - 8.0 */animation: mymove 5s infinite;}/* Safari 4.0 - 8.0 */#div1 {-webkit-animation-timing-function: linear;}#div2 {-webkit-animation-timing-function: ease;}#div3 {-webkit-animation-timing-function: ease-in;}#div4 {-webkit-animation-timing-function: ease-out;}#div5 {-webkit-animation-timing-function: ease-in-out;}/* Cú pháp tiêu chuẩn */#div1 {animation-timing-function: linear;}#div2 {animation-timing-function: ease;}#div3 {animation-timing-function: ease-in;}#div4 {animation-timing-function: ease-out;}#div5 {animation-timing-function: ease-in-out;}/* Safari 4.0 - 8.0 */@-webkit-keyframes mymove {from {left: 0px;}to {left: 500px;}}/* Cú pháp tiêu chuẩn */@keyframes mymove {from {left: 0px;}to {left: 500px;}}</style></head><body><div id="div1">linear</div><br><div id="div2">ease</div><br><div id="div3">ease-in</div><br><div id="div4">ease-out</div><br><div id="div5">ease-in-out</div></body></html>
Thuộc tính animation-fill-mode
Animation CSS không gây ảnh hưởng đến phần tử trước khi chạy keyframe đầu tiên và sau khi keyframe cuối cùng kết thúc. Và thuộc tính animation-fill-mode sử dụng để thay đổi trạng thái của phần tử trước khi bắt đầu sau khi kết thúc Animation.
Các giá trị có sẵn như sau:
- none: khi animation không hoạt động thì nó sẽ giữ nguyên trạng thái bất động của phần tử, không thêm một style nào vào thành phần (mặc định).
- forwards: khi animation không hoạt động sau khi kết thúc animation, giá trị này sẽ apply các thuộc tính của lần cuối cùng xuất hiện trong keyframe vào trạng thái của phần tử (phụ thuộc vào animation-direction và animation-iteration-count).
- backwards: khi animation không hoạt động trước khi bắt đầu animation (đang trong thời gian delay), giá trị này sẽ apply các thuộc tính của lần xuất hiện đầu tiên trong keyfame vào trạng thái của phần tử (phụ thuộc vào thuộc tính anmation-direction).
- both: kết hợp cả forwards và backwards cho trạng thái phần tử.
#div1 {-webkit-animation-fill-mode: none;}#div2 {-webkit-animation-fill-mode: forwards;}#div3 {-webkit-animation-fill-mode: backwards;}#div4 {-webkit-animation-fill-mode: both;}
Bạn thử tự demo để xem rõ sự khác biệt nhé, code đầy đủ đây:
<!DOCTYPE html><html><head><style>body{background-color: #e9d8f4}div {width: 100px;height: 100px;background: pink;font-family:arial;position: relative;-webkit-animation-name: example; /* Safari 4.0 - 8.0 */-webkit-animation-duration: 3s; /* Safari 4.0 - 8.0 */-webkit-animation-delay: 2s; /* Safari 4.0 - 8.0 */animation-name: example;animation-duration: 3s;animation-delay: 2s;}/* Safari 4.0 - 8.0 */#div1 {-webkit-animation-fill-mode: none;}#div2 {-webkit-animation-fill-mode: forwards;}#div3 {-webkit-animation-fill-mode: backwards;}#div4 {-webkit-animation-fill-mode: both;}/* Cú pháp tiêu chuẩn */#div1 {-webkit-animation-fill-mode: none;}#div2 {-webkit-animation-fill-mode: forwards;}#div3 {-webkit-animation-fill-mode: backwards;}#div4 {-webkit-animation-fill-mode: both;}/* Safari 4.0 - 8.0 */@-webkit-keyframes example {from {left: 0px; background-color: purple;}to {left: 500px; background-color: pink;}}@keyframes example {from {left: 0px; background-color: purple;}to {left: 500px; background-color: pink;}}</style></head><body><div id="div1">none</div><br><div id="div2">forwards</div><br><div id="div3">backwards</div><br><div id="div4">both</div><br></body></html>
Gộp chung các thuộc tính
Ta có một animation khai báo đầy đủ 6 thuộc tính như sau:
div {animation-name: example;animation-duration: 5s;animation-timing-function: linear;animation-delay: 2s;animation-iteration-count: infinite;animation-direction: alternate;}
Tuy nhiên trong một vài trường hợp, việc khai đầy đủ như trên là không cần thiết và dài dòng. Vì vậy CSS hỗ trợ chúng ta một thuộc tính có thể khai báo toàn bộ giá trị của các thuộc tính trên, đó là thuộc tính animation.
Cú pháp sử dụng như sau (chú ý thứ tự khai báo):
animation: name | duration | timing-function | delay | iteration-count | direction | fill-modeVậy ví dụ trên có thể được khai báo ngắn gọn trong 1 dòng như sau:
div {animation: example 5s linear 2s infinite alternate;}
Mẹo dùng animation CSS lập trình viên cần biết
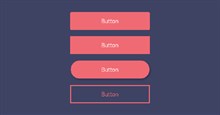
Biến đổi một thành phần khi trỏ chuột
Một cách thiết kế phổ biến là có yếu tố mở rộng khi được tương tác. Ví dụ, bạn có thể dịch chuyển các nút bấm một chút lên phía trên khi ai đó trỏ chuột vào nó. Để làm việc đó, bạn chỉ cần thuộc tính transform.
Khai báo nhiều keyframe bằng một khai báo
Mẫu phổ biến khác ở các animation trong css là lặp cùng một giá trị nhiều lần, có thể là màu sắc, kích thước hoặc hướng nào đó. Bạn có thể đạt được hiệu ứng keyframe CSS bằng cách khai bao nhiều keyframe với một khai báo.
Dùng @property để tạo hiệu ứng thuộc tính tùy biến
Không phải tất cả thuộc tính trong CSS đều có thể tạo hiệu ứng động. Nếu muốn tạo hiệu ứng cho thành phần non-animatable, tốt nhất bạn nên dùng lệnh @property.
Dùng prefers-reduced-motion để kích hoạt Preferences
Luôn nhớ rằng rất nhiều người không thích hiệu ứng dựa trên chuyển động. Thực tế, hầu hết người dùng đều có tùy chọn trong trình duyệt có thể tắt chuyển động để không bị sao nhãng. Bạn dễ dàng có thể kiểm soát vấn đề này bằng cách đóng gói hiệu ứng bên trong một truy vấn media no-preference.
Ví dụ về hiệu ứng CSS sáng tạo
Mở phong bì thư
Đây là một trong số mẫu được nhiều người ưa thích. Hiệu ứng CSS thanh lịch này chăm chút tới từng chi tiết. Từ chuyển động đi xuống khi phong bì mở tới thông tin chi tiết trên giấy, tới đổ bóng bên dưới, rõ ràng những chi tiết nhỏ đã tạo nên một hiệu ứng nhất quán, mượt mà. Bạn có thể dùng nó làm nút bấm hoặc hiệu ứng cuộn màn hình.
body {
	background: #323641;
}

.letter-image {
	position: absolute;
	top: 50%;
	left: 50%;
	width: 200px;
	height: 200px;
	-webkit-transform: translate(-50%, -50%);
	-moz-transform: translate(-50%, -50%);
	transform: translate(-50%, -50%);
	cursor: pointer;
}

.animated-mail {
	position: absolute;
	height: 150px;
	width: 200px;
	-webkit-transition: .4s;
	-moz-transition: .4s;
	transition: .4s;

	.body {
		position: absolute;
		bottom: 0;
		width: 0;
		height: 0;
		border-style: solid;
		border-width: 0 0 100px 200px;
		border-color: transparent transparent #e95f55 transparent;
		z-index: 2;
	}

	.top-fold {
		position: absolute;
		top: 50px;
		width: 0;
		height: 0;
		border-style: solid;
		border-width: 50px 100px 0 100px;
		-webkit-transform-origin: 50% 0%;
		-webkit-transition: transform .4s .4s, z-index .2s .4s;
		-moz-transform-origin: 50% 0%;
		-moz-transition: transform .4s .4s, z-index .2s .4s;
		transform-origin: 50% 0%;
		transition: transform .4s .4s, z-index .2s .4s;
		border-color: #cf4a43 transparent transparent transparent;
		z-index: 2;
	}

	.back-fold {
		position: absolute;
		bottom: 0;
		width: 200px;
		height: 100px;
		background: #cf4a43;
		z-index: 0;
	}

	.left-fold {
		position: absolute;
		bottom: 0;
		width: 0;
		height: 0;
		border-style: solid;
		border-width: 50px 0 50px 100px;
		border-color: transparent transparent transparent #e15349;
		z-index: 2;
	}

	.letter {
		left: 20px;
		bottom: 0px;
		position: absolute;
		width: 160px;
		height: 60px;
		background: white;
		z-index: 1;
		overflow: hidden;
		-webkit-transition: .4s .2s;
		-moz-transition: .4s .2s;
		transition: .4s .2s;

		.letter-border {
			height: 10px;
			width: 100%;
      background: repeating-linear-gradient(
        -45deg,
        #cb5a5e,
        #cb5a5e 8px,
        transparent 8px,
        transparent 18px
      );
		}

		.letter-title {
			margin-top: 10px;
			margin-left: 5px;
			height: 10px;
			width: 40%;
			background: #cb5a5e;
		}
		.letter-context {
			margin-top: 10px;
			margin-left: 5px;
			height: 10px;
			width: 20%;
			background: #cb5a5e;
		}

		.letter-stamp {
			margin-top: 30px;
			margin-left: 120px;
			border-radius: 100%;
			height: 30px;
			width: 30px;
			background: #cb5a5e;
			opacity: 0.3;
		}
	}
}

.shadow {
	position: absolute;
	top: 200px;
	left: 50%;
	width: 400px;
	height: 30px;
	transition: .4s;
	transform: translateX(-50%);
	-webkit-transition: .4s;
	-webkit-transform: translateX(-50%);
	-moz-transition: .4s;
	-moz-transform: translateX(-50%);

	border-radius: 100%;
	background: radial-gradient(rgba(0,0,0,0.5), rgba(0,0,0,0.0), rgba(0,0,0,0.0));
}

	.letter-image:hover {
		.animated-mail {
			transform: translateY(50px);
			-webkit-transform: translateY(50px);
			-moz-transform: translateY(50px);
		}

		.animated-mail .top-fold {
			transition: transform .4s, z-index .2s;
			transform: rotateX(180deg);
			-webkit-transition: transform .4s, z-index .2s;
			-webkit-transform: rotateX(180deg);
			-moz-transition: transform .4s, z-index .2s;
			-moz-transform: rotateX(180deg);
			z-index: 0;
		}

		.animated-mail .letter {
			height: 180px;
		}

		.shadow {
			width: 250px;
		}
	}
Bạn nên đọc


Theo Nghị định 147/2024/ND-CP, bạn cần xác thực tài khoản trước khi sử dụng tính năng này. Chúng tôi sẽ gửi mã xác thực qua SMS hoặc Zalo tới số điện thoại mà bạn nhập dưới đây:
 Hướng dẫn AI
 Ứng dụng
 Hệ thống
 Game - Trò chơi
 iPhone
 Android
 Làng Công nghệ
 Hàm Excel
 Cuộc sống
 Khoa học