 AI
AI
 ChatGPT
 Gemini
 Thư viện Prompt
 Công nghệ
 Học IT
 Tiện ích

Hầu hết trang web ngày nay đều yêu cầu người dùng đăng ký để sử dụng đầy đủ tính năng truy cập trang đặc biệt nào đó, nhưng xây dựng màn hình đăng nhập là một trong số những việc tẻ nhạt nhất.
Ở bài viết này, hãy cùng Quantrimang.com tìm hiểu cách xây dựng một màn hình đăng nhập đơn giản nhưng đẹp mắt bằng React và Bootstrap 5 nhé!
Yêu cầu cần thiết
- Kiến thức cơ bản về HTML, CSS và Javascript.
- Hiểu biết cơ bản về React.
- Thiết lập NodeJS trên máy tính.
Thiết lập app React
Chạy lệnh sau để tạo một dự án react mới:
npx create-react-app react-loginMở dự án và khởi động ứng dụng:
cd react-login
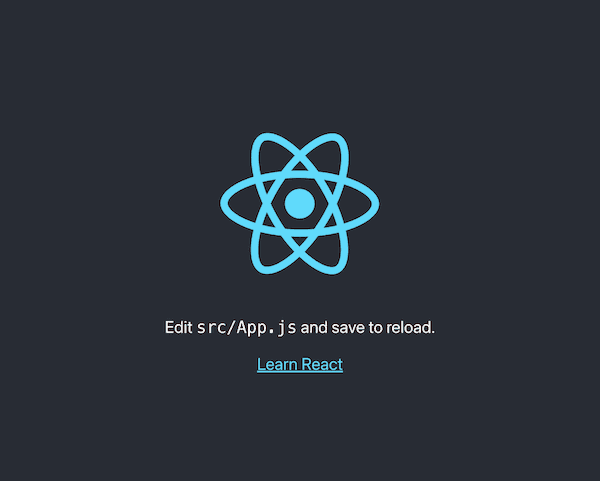
npm startKhi quá trình build đã sẵn sàng, ứng dụng trông sẽ như sau:
Cài đặt Bootstrap
Cài đặt Bootstrap bằng npm:
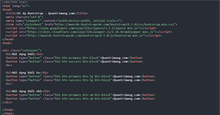
npm install –save bootstrapChỉnh sửa App.js và thêm một lệnh nhập cho bootstrap:
import "bootstrap/dist/css/bootstrap.min.css"Tiếp tục và xóa mã soạn sẵn mà app React mặc định thêm vào App.js. File này trông sẽ giống như thế này:
import "bootstrap/dist/css/bootstrap.min.css"
import "./App.css"

function App() {
return <div className="App"></div>
}

export default App
Thiết lập lộ trình
Đầu tiên, bạn cần tạo một phần tử mới Auth trong Auth.js. Chúng ta sẽ hoạt động trên phần tử Auth cần để thiết lập lộ trình.
import React from "react"

export default function (props) {
return <div>Auth Screen</div>
}
Trong ứng dụng thực tế, bạn sẽ điều hướng người dùng tới màn hình đăng nhập nếu họ chưa làm việc đó. Đây là nơi điều hướng xuất hiện, hãy chạy lệnh sau để cài react-router-dom, khởi động lại app react sau khi hoàn tất cài đặt.
npm install --save react-router-domChỉnh sửa file App.js để thiết lập lộ trình đăng nhập và mặc định. Dưới đây là giao diện đăng nhập trên route /auth.
import "bootstrap/dist/css/bootstrap.min.css"
import "./App.css"
import { BrowserRouter, Routes, Route } from "react-router-dom"
import Auth from "./Auth"

function App() {
return (
<BrowserRouter>
<Routes>
<Route path="/auth" element={<Auth />} />
</Routes>
</BrowserRouter>
)
}

export default App
Tạo biểu mẫu đăng nhập
Chỉnh sửa Auth.js vừa tạo lúc đầu:
import React from "react"

export default function (props) {
return (
<div className="Auth-form-container">
<form className="Auth-form">
<div className="Auth-form-content">
<h3 className="Auth-form-title">Sign In</h3>
<div className="form-group mt-3">
<label>Email address</label>
<input
type="email"
className="form-control mt-1"
placeholder="Enter email"
/>
</div>
<div className="form-group mt-3">
<label>Password</label>
<input
type="password"
className="form-control mt-1"
placeholder="Enter password"
/>
</div>
<div className="d-grid gap-2 mt-3">
<button type="submit" className="btn btn-primary">
Submit
</button>
</div>
<p className="forgot-password text-right mt-2">
Forgot <a href="#">password?</a>
</p>
</div>
</form>
</div>
)
}
Chỉnh sửa App.css để bao gồm:
.App {
background-color: white;
}
.Auth-form-container {
display: flex;
justify-content: center;
align-items: center;
width: 100vw;
height: 100vh;
}
.Auth-form {
width: 420px;
box-shadow: rgb(0 0 0 / 16%) 1px 1px 10px;
padding-top: 30px;
padding-bottom: 20px;
border-radius: 8px;
background-color: white;
}
.Auth-form-content {
padding-left: 12%;
padding-right: 12%;
}
.Auth-form-title {
text-align: center;
margin-bottom: 1em;
font-size: 24px;
color: rgb(34, 34, 34);
font-weight: 800;
}
label {
font-size: 14px;
font-weight: 600;
color: rgb(34, 34, 34);
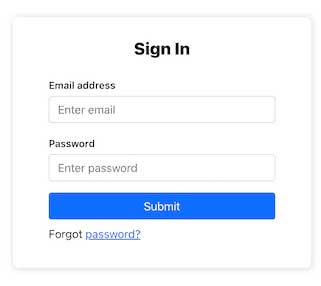
}Nếu mở route /auth, bạn sẽ thấy biểu mẫu sau:
Thêm biểu mẫu đăng ký
Thông thường, lập trình viên thường muốn người dùng đăng ký nếu họ chưa có tài khoản. Chỉnh sửa phần tử Auth.js:
import React, { useState } from "react"
export default function (props) {
let [authMode, setAuthMode] = useState("signin")
const changeAuthMode = () => {
setAuthMode(authMode === "signin" ? "signup" : "signin")
}
if (authMode === "signin") {
return (
<div className="Auth-form-container">
<form className="Auth-form">
<div className="Auth-form-content">
<h3 className="Auth-form-title">Sign In</h3>
<div className="text-center">
Not registered yet?{" "}
<span className="link-primary" onClick={changeAuthMode}>
Sign Up
</span>
</div>
<div className="form-group mt-3">
<label>Email address</label>
<input
type="email"
className="form-control mt-1"
placeholder="Enter email"
/>
</div>
<div className="form-group mt-3">
<label>Password</label>
<input
type="password"
className="form-control mt-1"
placeholder="Enter password"
/>
</div>
<div className="d-grid gap-2 mt-3">
<button type="submit" className="btn btn-primary">
Submit
</button>
</div>
<p className="text-center mt-2">
Forgot <a href="#">password?</a>
</p>
</div>
</form>
</div>
)
}
return (
<div className="Auth-form-container">
<form className="Auth-form">
<div className="Auth-form-content">
<h3 className="Auth-form-title">Sign In</h3>
<div className="text-center">
Already registered?{" "}
<span className="link-primary" onClick={changeAuthMode}>
Sign In
</span>
</div>
<div className="form-group mt-3">
<label>Full Name</label>
<input
type="email"
className="form-control mt-1"
placeholder="e.g Jane Doe"
/>
</div>
<div className="form-group mt-3">
<label>Email address</label>
<input
type="email"
className="form-control mt-1"
placeholder="Email Address"
/>
</div>
<div className="form-group mt-3">
<label>Password</label>
<input
type="password"
className="form-control mt-1"
placeholder="Password"
/>
</div>
<div className="d-grid gap-2 mt-3">
<button type="submit" className="btn btn-primary">
Submit
</button>
</div>
<p className="text-center mt-2">
Forgot <a href="#">password?</a>
</p>
</div>
</form>
</div>
)
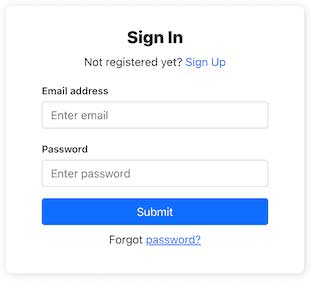
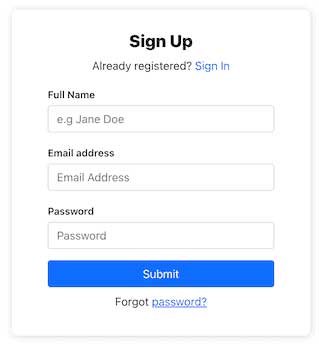
}Dùng useState để thay đổi giữa đăng nhập và đăng ký. Giờ khi truy cập /auth, bạn có thể chuyển giữa đăng nhập và đăng ký.
Trên đây là cách tạo UI đăng nhập/đăng ký bằng React với Bootstrap. Hi vọng bài viết hữu ích với các bạn.


 Hướng dẫn AI
 Ứng dụng
 Hệ thống
 Game - Trò chơi
 iPhone
 Android
 Làng Công nghệ
 Hàm Excel
 Cuộc sống
 Khoa học