-
Chụp màn hình máy tính là thao tác giúp bạn nhanh chóng và dễ dàng lưu hoặc chia sẻ ngay những thông tin đang hiển thị trên màn hình máy tính. Để chụp màn hình máy tính, bạn có thể dùng phím tắt hoặc công cụ có sẵn trên Windows, macOS, Linux.
-
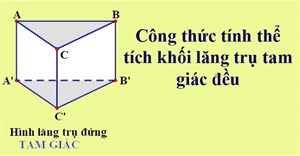
Công thức tính thể tích hình lăng trụ đứng: Thể tích hình lăng trụ đứng bằng tích của diện tích đáy nhân với chiều cao.
-
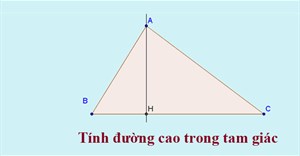
Đường cao trong tam giác là một đường thẳng có tính chất quan trọng và liên quan rất nhiều đến các bài toán hình học phẳng. Vậy đường cao là gì, cách tính đường cao trong tam giác như thế nào?
-

Mời các bạn cùng tham khảo hướng dẫn chia sẻ mật khẩu Wi-Fi từ iPhone của bạn tới một thiết bị chạy iOS 11 khác trong bài viết này nhé!
-

Mất âm thanh trên máy tính là vấn đề xảy ra khá thường xuyên và cũng có nhiều cách để khắc phục tình trạng mất âm thanh trên Windows. Trong bài viết này, Quantrimang.com sẽ mách bạn 4 phương pháp sửa lỗi không nghe được âm thanh trên máy tính.
-

Bạn có thể sử dụng công cụ tạo tên với kí tự đặc biệt, hoặc dùng những kí tự đặc biệt phân theo chủ đề mà Quantrimang đã tổng hợp dưới đây để tạo tên Facebook, tên nhân vật trong trò chơi cho riêng mình.
-

Ký hiệu @ hiển thị ở rất nhiều dạng nội dung và không đặc biệt như một số ký hiệu dùng cho Toán học, nên chúng ta có rất nhiều cách để gõ a còng.
-

Là người nhạt nhẽo không phải là tội, thế nhưng nó sẽ khiến tự ti trong giao tiếp, có ít bạn bè, cuộc sống nhàm chán. Nếu muốn thay đổi và trở thành một con người thú vị hơn trong mắt bạn bè, gây được ấn tượng với mọi người, bạn hãy tham khảo bài viết dưới đây.
 Công nghệ
  Tiện ích
  Khoa học
  Cuộc sống
  Làng Công nghệ
  Học CNTT
  Ứng dụng
  Game - Trò chơi
  iPhone
  Nếu bạn muốn nhận spin Coin Master miễn phí, bạn hãy xem qua cách chạy spin, kiếm spin trong Coin Master ở bài viết này nhé. Đơn giản mà lại kiếm được nhiều lượt spin.
 Đội hình TFT mùa 11 trong danh sách này sẽ giúp bạn cập nhật những đội hình hot nhất meta để sử dụng và leo rank một cách hiệu quả.


 Công nghệ
  Ứng dụng
  Hệ thống
  Game - Trò chơi
  iPhone
  Android
  Linux
Linux  Đồng hồ thông minh
  Chụp ảnh - Quay phim
  macOS
macOS  Phần cứng
  Thủ thuật SEO
  Kiến thức cơ bản
  Dịch vụ ngân hàng
  Lập trình
  Dịch vụ công trực tuyến
  Dịch vụ nhà mạng
  Nhà thông minh
  Download
  Ứng dụng văn phòng
  Tải game
  Tiện ích hệ thống
  Ảnh, đồ họa
  Internet
  Bảo mật, Antivirus
  Họp, học trực tuyến
  Video, phim, nhạc
  Giao tiếp, liên lạc, hẹn hò
  Hỗ trợ học tập
  Máy ảo
  Tiện ích
  Khoa học
  Điện máy
  Tivi
Tivi  Tủ lạnh
  Điều hòa
  Máy giặt
  Quạt các loại
  Cuộc sống
  Kỹ năng
  Món ngon mỗi ngày
  Làm đẹp
  Nuôi dạy con
  Chăm sóc Nhà cửa
  Du lịch
  Halloween
  Mẹo vặt
  Giáng sinh - Noel
  Quà tặng
  Giải trí
  Là gì?
  Nhà đẹp
  TOP
TOP  Ô tô, Xe máy
  Giấy phép lái xe
  Làng Công nghệ
  Tấn công mạng
  Chuyện công nghệ
  Công nghệ mới
  Trí tuệ nhân tạo (AI)
  Anh tài công nghệ
  Bình luận công nghệ
  Học CNTT
  Quiz công nghệ
  Microsoft Word 2016
  Microsoft Word 2013
  Microsoft Word 2007
  Microsoft Excel 2019
  Microsoft Excel 2016
  Google Sheets - Trang tính
  Code mẫu
  Photoshop CS6
  Photoshop CS5
  Bootstrap